Sloppy Joe Recipe (From Scratch, No Canned Sauce)
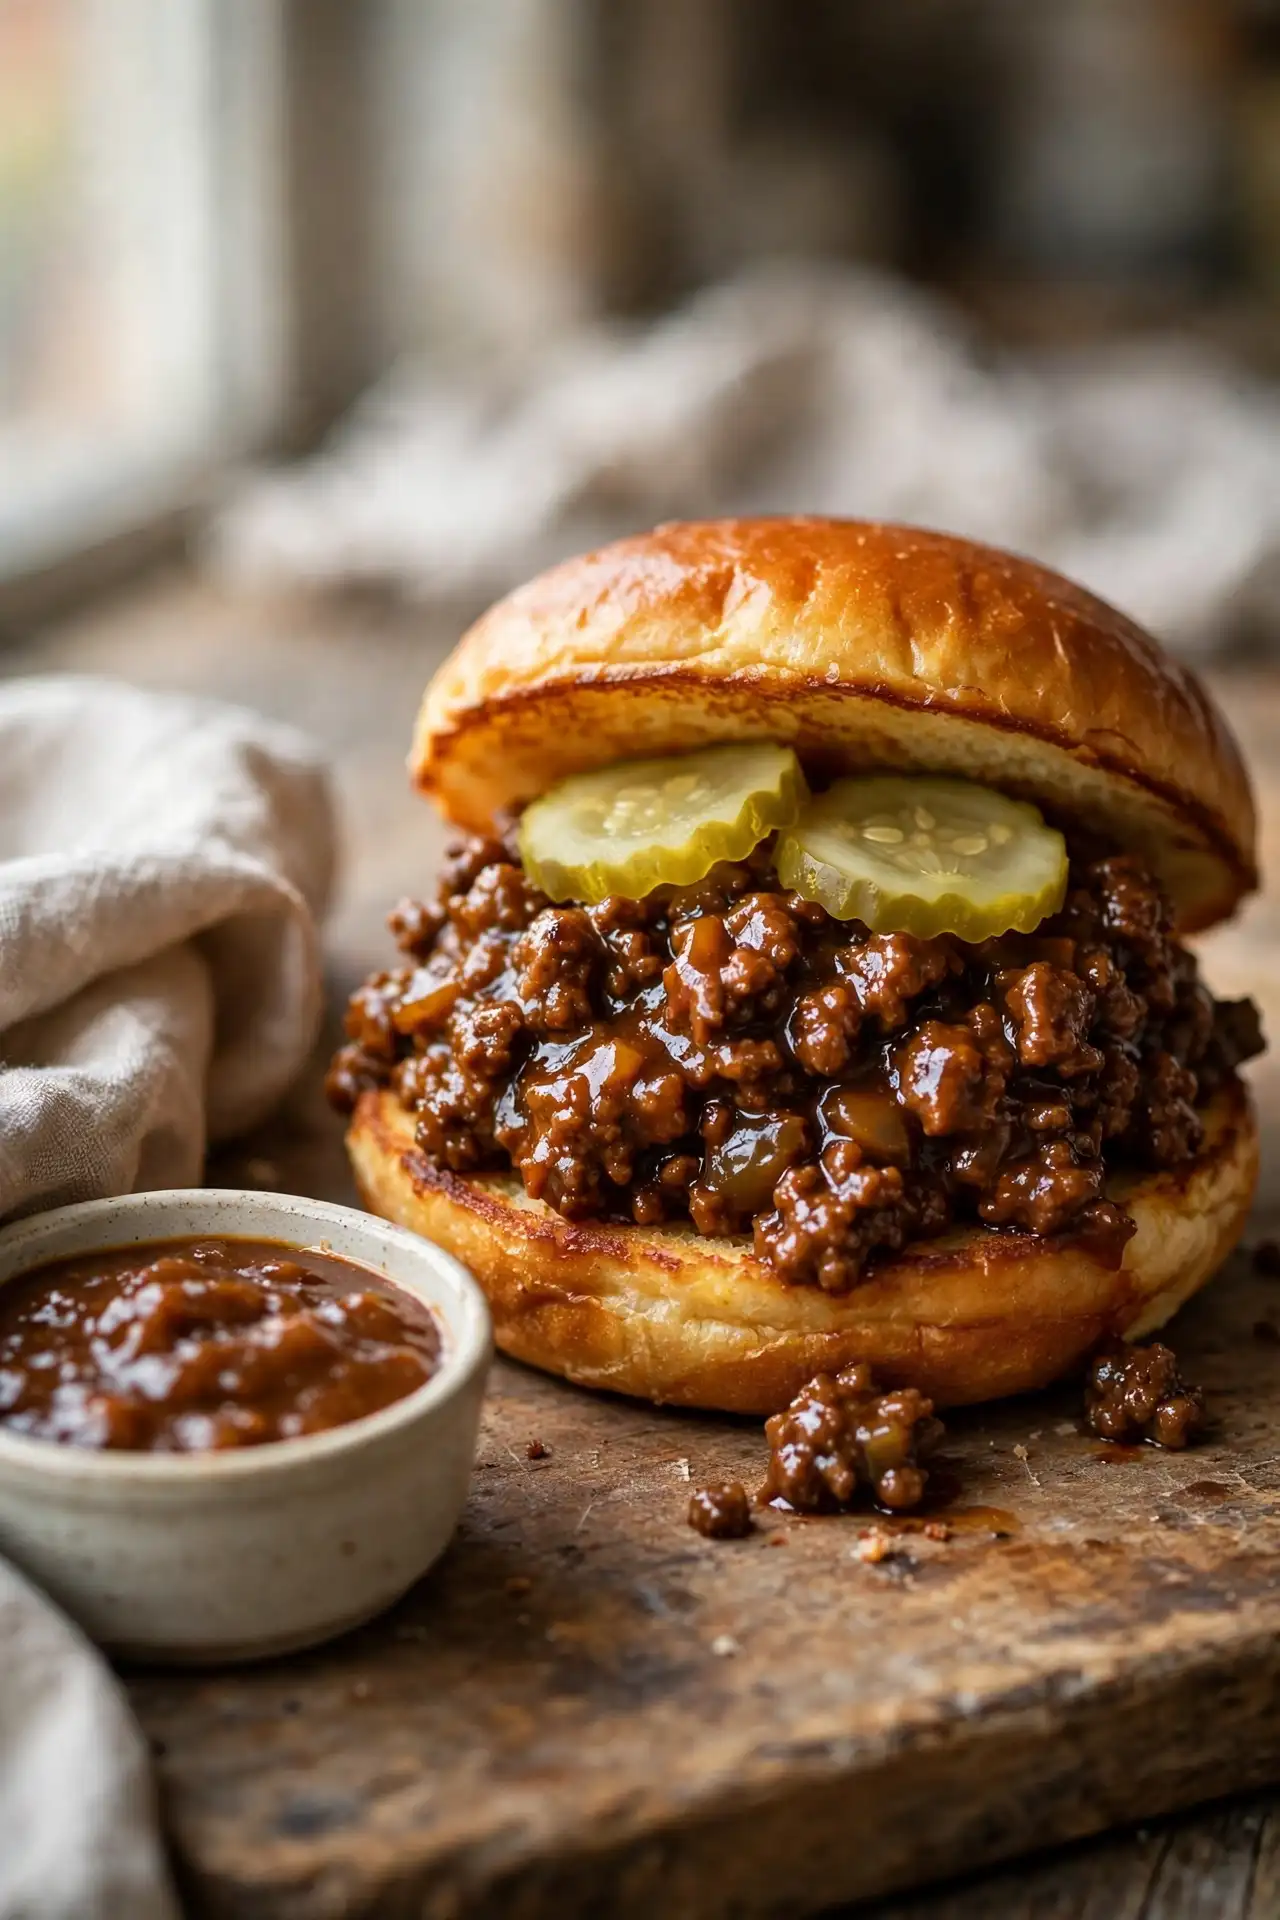
Sloppy joes made from scratch take about 30 minutes, roughly the same time as heating a canned sauce. This sloppy joe recipe skips the can entirely and builds the filling from ketchup, tomato paste, Worcestershire sauce, and a handful of spices you almost certainly already have on the shelf.
Getting it right comes down to two things: browning the beef properly and simmering the sauce uncovered until it thickens. Both take maybe five minutes of active attention. The rest is just waiting.
This version makes four generous sandwiches. It also keeps well in the fridge for several days, so it is worth making even if you only need two tonight. If you have only ever made these with a packet or a can, the difference is worth finding out.
Why You’ll Love This Sloppy Joe Recipe
- Ready in 30 minutes with no marinating or extended simmering required
- Uses pantry ingredients: ketchup, tomato paste, Worcestershire sauce, smoked paprika, and brown sugar
- The filling is thick enough to stay on the bun instead of running off onto the plate
- Freezes well, so you can double the batch and have a fast dinner ready for next week
- No canned sauce with added corn syrup or unpronounceable stabilizers
Ingredients You’ll Need
For the Sloppy Joe Filling
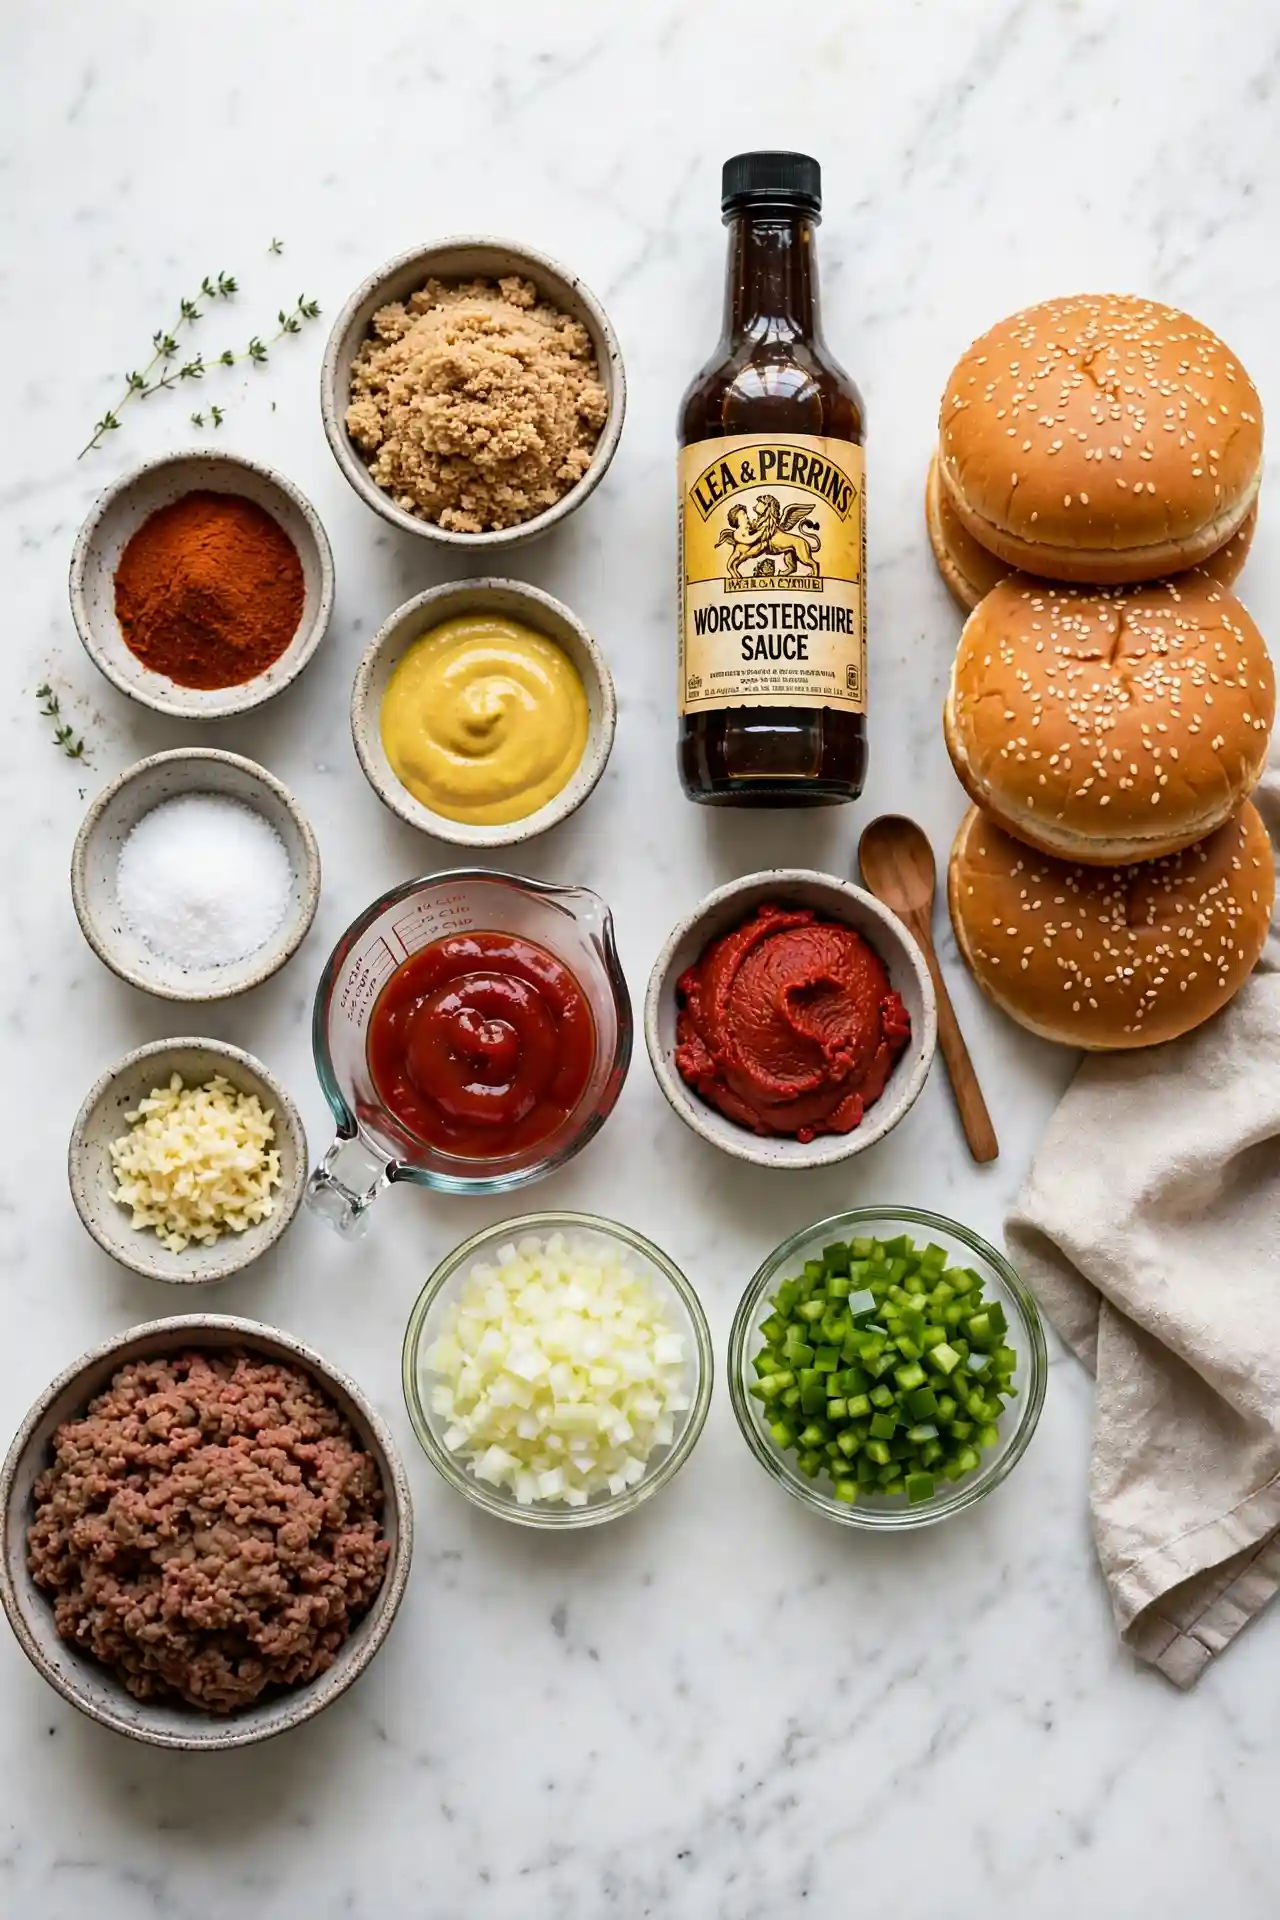
- 1 lb (450g) ground beef, 80/20 blend — the fat content keeps the filling moist and flavorful after simmering; leaner beef turns dry and grainy in a sauce like this
- 1 medium yellow onion, finely diced (about 1 cup) — finely diced so it cooks down fully and disappears into the filling
- 1 medium green bell pepper, finely diced (about 3/4 cup) — adds mild sweetness and a bit of texture without overpowering the beef
- 3 garlic cloves, minced — added after the vegetables so it does not burn on a dry pan
- 1/2 cup (120ml) ketchup — the base of the sauce; a good-quality brand without high-fructose corn syrup makes a noticeable difference
- 2 tbsp tomato paste — cooked briefly in the pan to concentrate and deepen the tomato flavor
- 1 tbsp Worcestershire sauce — adds savory depth; contains anchovies (see allergen note below)
- 1 tbsp brown sugar, packed — balances the acidity of the ketchup and tomato paste; adjust to taste after simmering
- 1 tsp yellow mustard — not dijon; yellow mustard gives the right mild tang for this dish
- 1/2 tsp smoked paprika — adds subtle smokiness without needing any additional equipment
- 1/2 tsp fine salt, plus more to taste
- 1/4 tsp black pepper
- 1/4 cup (60ml) water or beef stock — loosens the sauce at the start of simmering; it reduces down as the sauce cooks
- 1 tbsp neutral oil (vegetable or sunflower)
For Serving
- 4 hamburger buns, toasted — toasting is not optional; a raw bun soaks through within two minutes under the hot filling
- Sliced bread-and-butter pickles (optional but genuinely recommended)
- Creamy coleslaw (optional; see serving suggestions below)
Recipe Timing
| Timing Element | Duration |
|---|---|
| Prep Time | 10 minutes |
| Cook Time | 20 minutes |
| Total Time | 30 minutes |
Servings: 4 | Difficulty: Easy | Cuisine: American | Course: Main
How to Make This Sloppy Joe Recipe: Step by Step
Step 1: Brown the ground beef
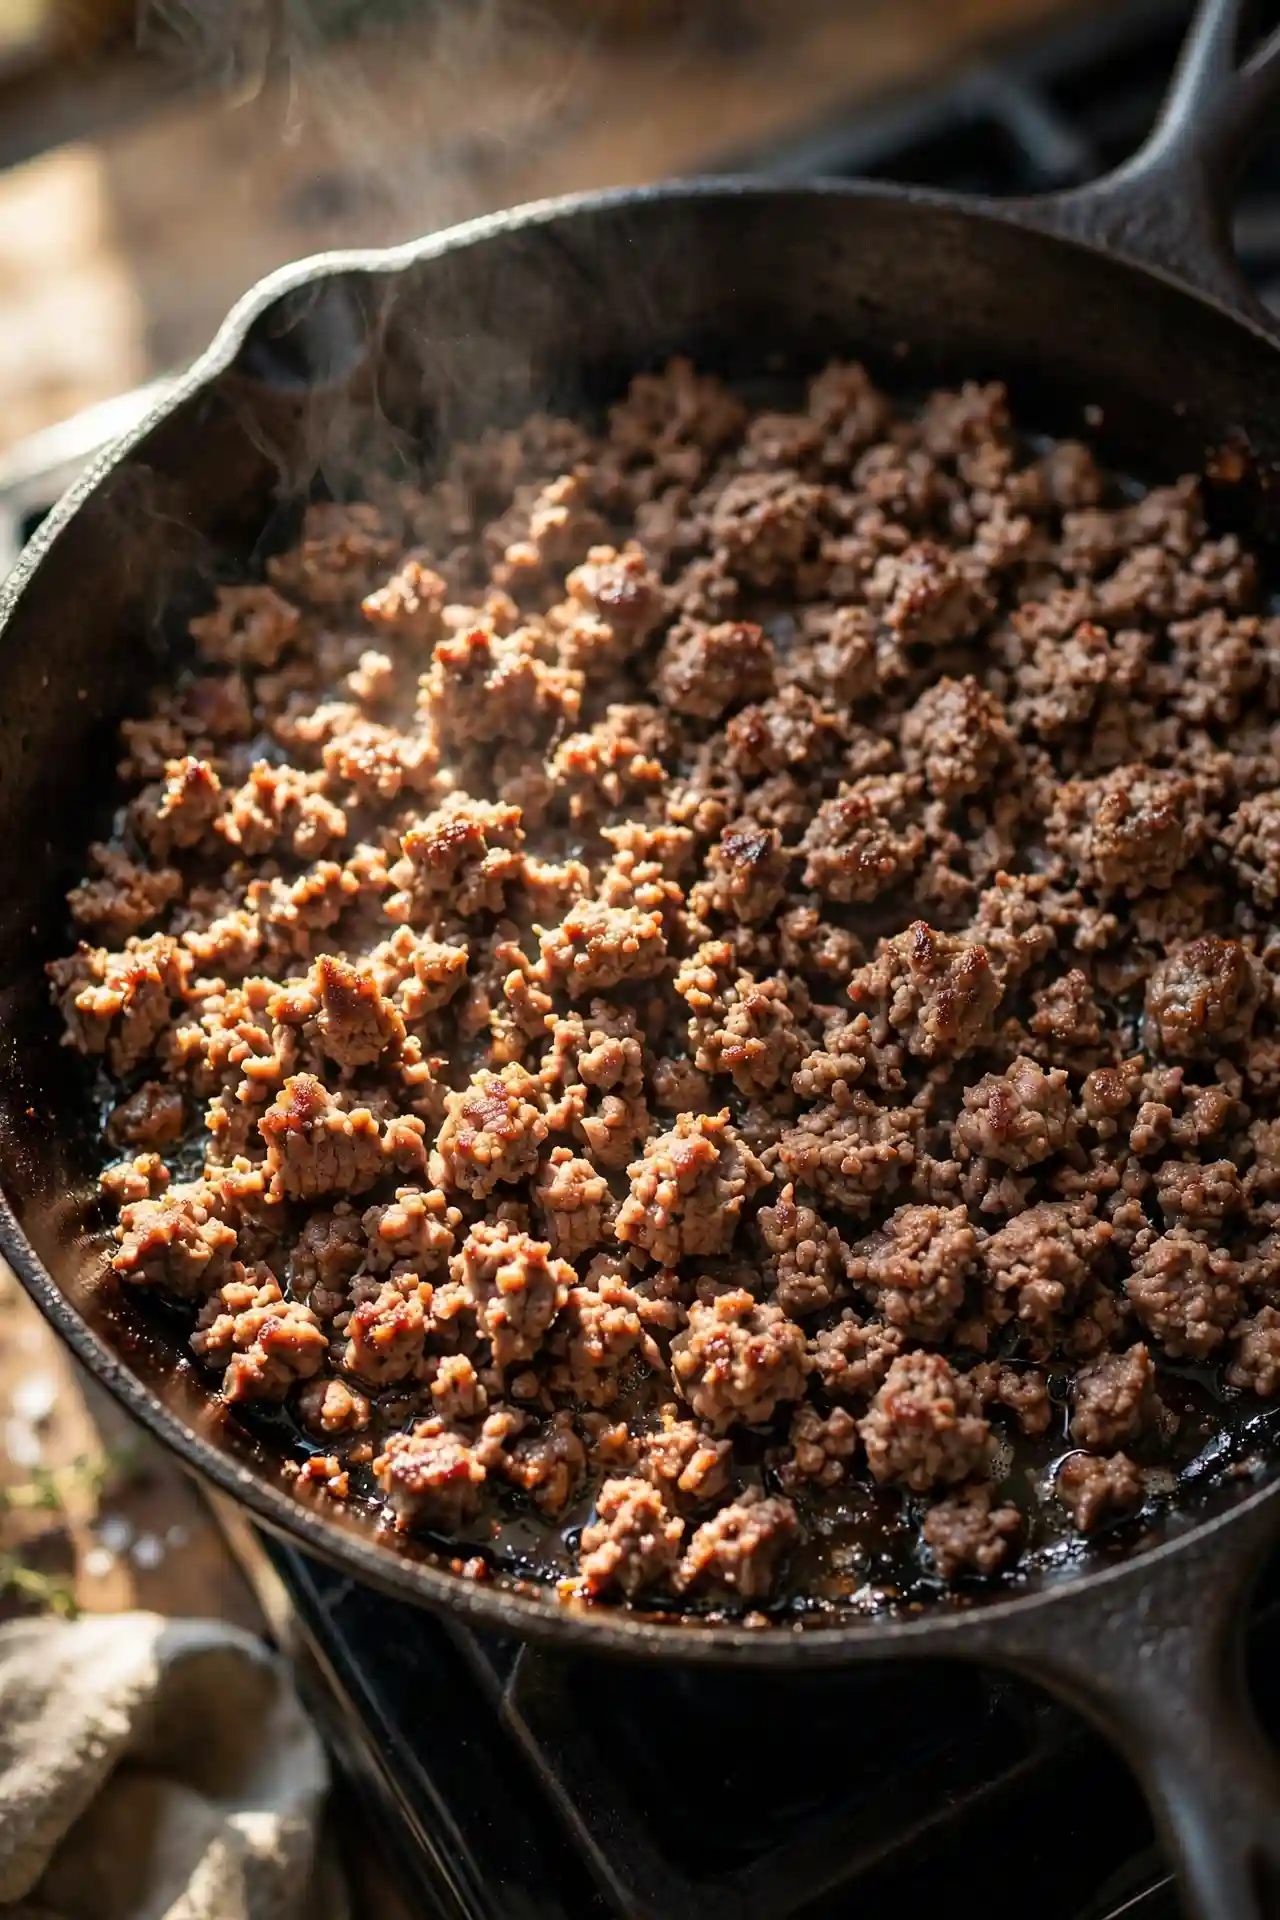
Heat the oil in a large skillet over medium-high heat. Add the ground beef and break it into small crumbles with a wooden spoon or spatula.
⚠️ Food Safety: Ground beef must reach an internal temperature of 71°C (160°F) to be safe to eat. Use a meat thermometer to confirm if you are unsure. According to USDA safe minimum internal temperature guidelines, ground beef requires a minimum of 160°F — this is lower than poultry and higher than whole cuts of beef.
Cook for 6 to 8 minutes, stirring occasionally. Leave the beef undisturbed for 30 to 45 second intervals so the bottom has time to brown rather than steam. Stop when the beef is no longer pink and you can see caramelized, browned edges on some of the crumbles.
Drain the excess fat, leaving about 1 tablespoon in the pan to cook the vegetables.
Why this works: Letting the beef sit between stirs triggers the Maillard reaction, which creates flavor compounds you simply cannot get from grey, steamed meat. Those browned edges translate directly into depth in the final sauce.
Step 2: Soften the vegetables
Add the diced onion and bell pepper to the skillet with the browned beef. Cook over medium heat for 4 to 5 minutes, stirring occasionally, until the onion is fully translucent and the bell pepper has softened.
Add the minced garlic and cook for 1 minute, stirring constantly, until fragrant. The garlic should not take on any color.
Step 3: Cook the tomato paste
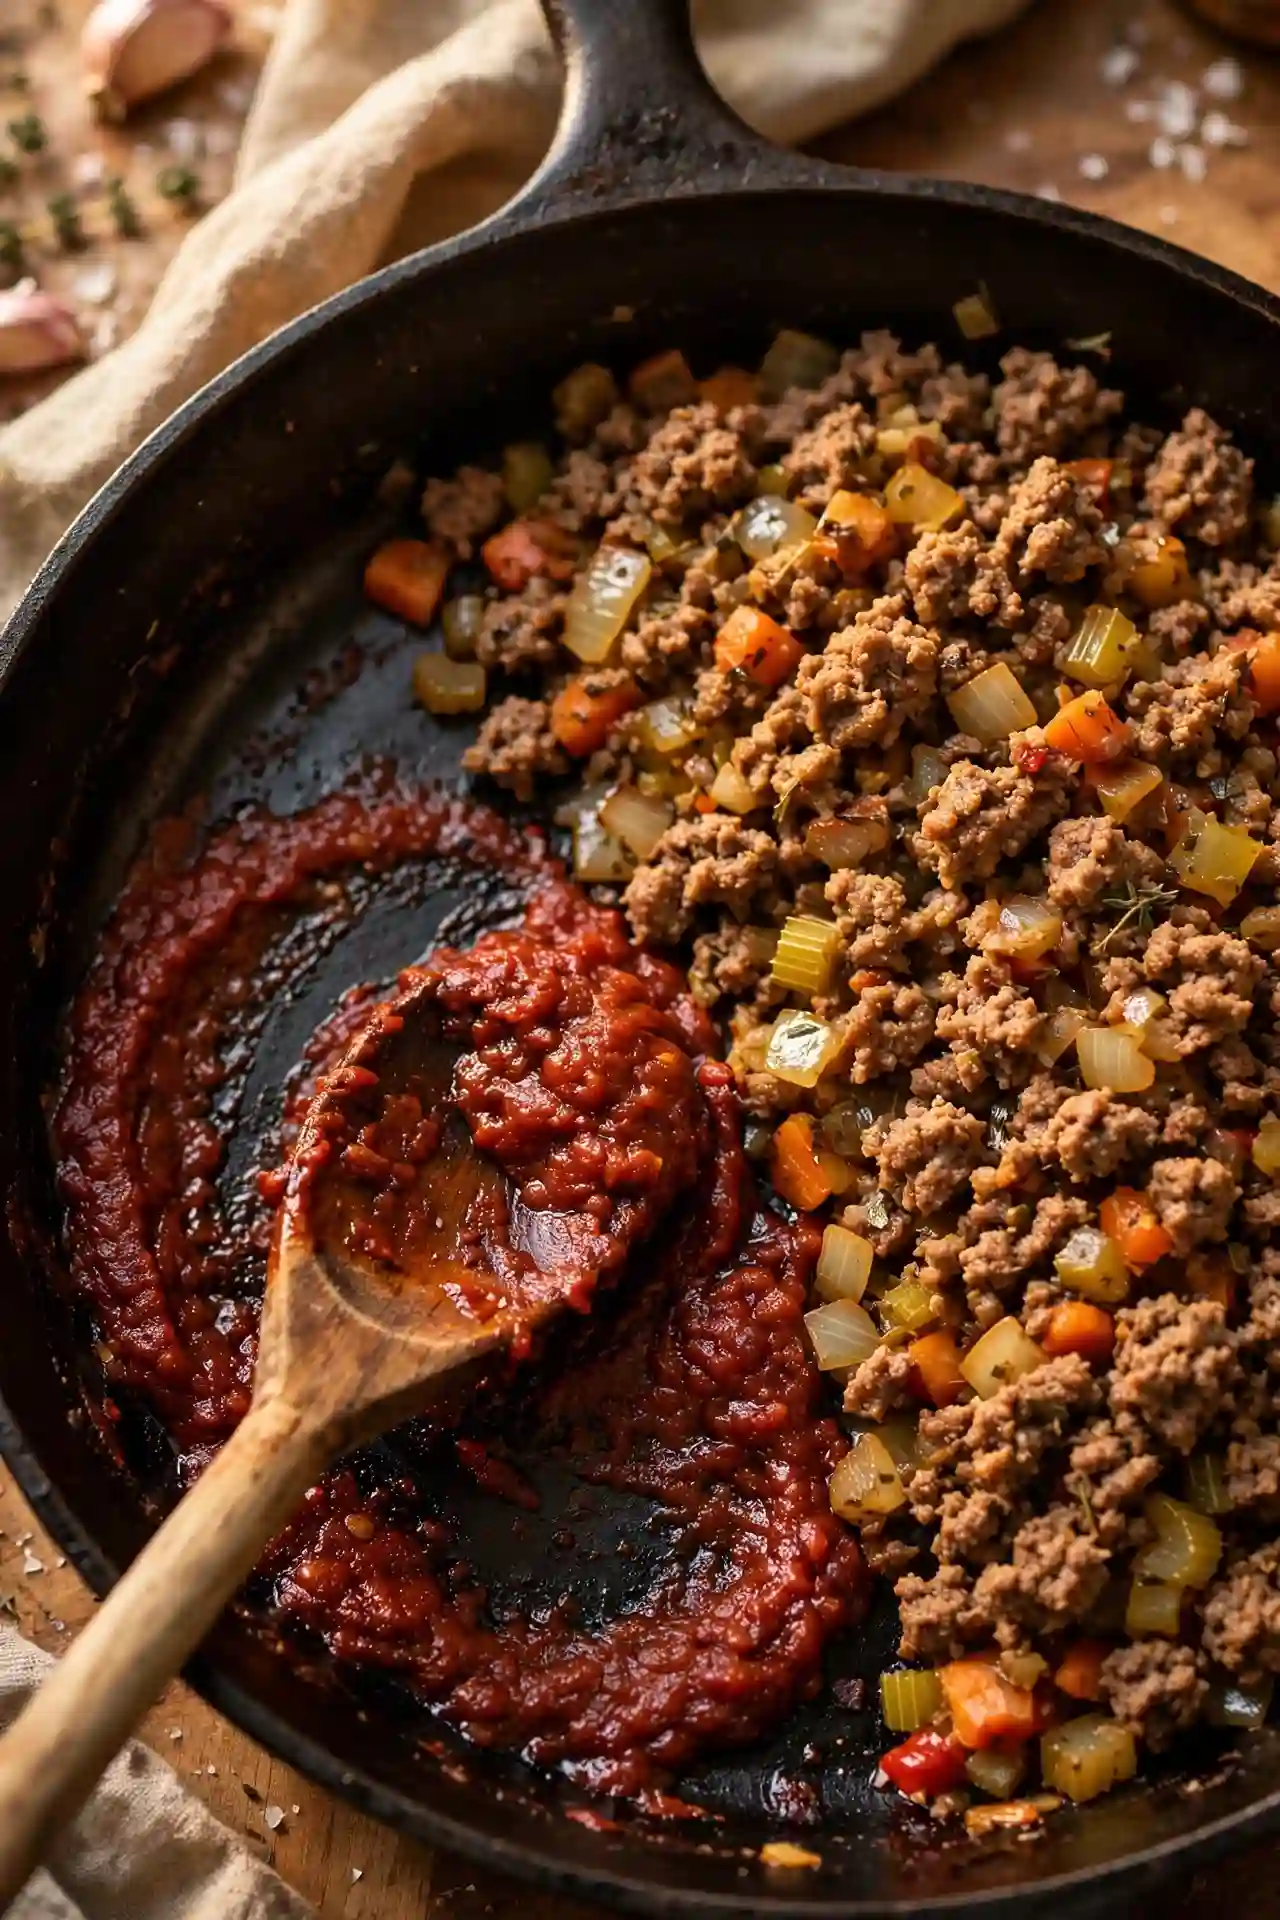
Push the beef and vegetable mixture to one side of the pan. Add the tomato paste to the cleared space and cook it directly on the pan surface for 1 to 2 minutes, stirring it around in that space until it darkens from bright orange-red to a deeper brick-red color.
Stir the cooked tomato paste through the entire beef and vegetable mixture.
Why this works: Cooking tomato paste directly on the hot pan caramelizes its natural sugars and drives off the raw, slightly tinny flavor that straight-from-the-can tomato paste has. It gives the sauce a noticeably rounder, richer base.
Step 4: Add the sauce
Add the ketchup, Worcestershire sauce, brown sugar, yellow mustard, smoked paprika, salt, black pepper, and water (or beef stock) to the skillet. Stir everything together until fully combined and the mixture has an even, glossy color throughout.
Step 5: Simmer and reduce
Reduce the heat to medium-low. Simmer the filling uncovered for 8 to 10 minutes, stirring every couple of minutes, until the sauce has thickened to the point where it briefly holds a channel when you drag a spoon across the bottom of the pan.
The filling is ready when it sits on a bun without immediately spreading into a puddle. Taste and adjust salt or brown sugar at this stage if needed.
Why this works: Simmering uncovered allows the excess liquid to evaporate and the flavors to concentrate. Putting a lid on traps steam and keeps the filling loose and watery, which is the most common reason homemade sloppy joes end up soggy.
Step 6: Toast the buns and build the sandwiches
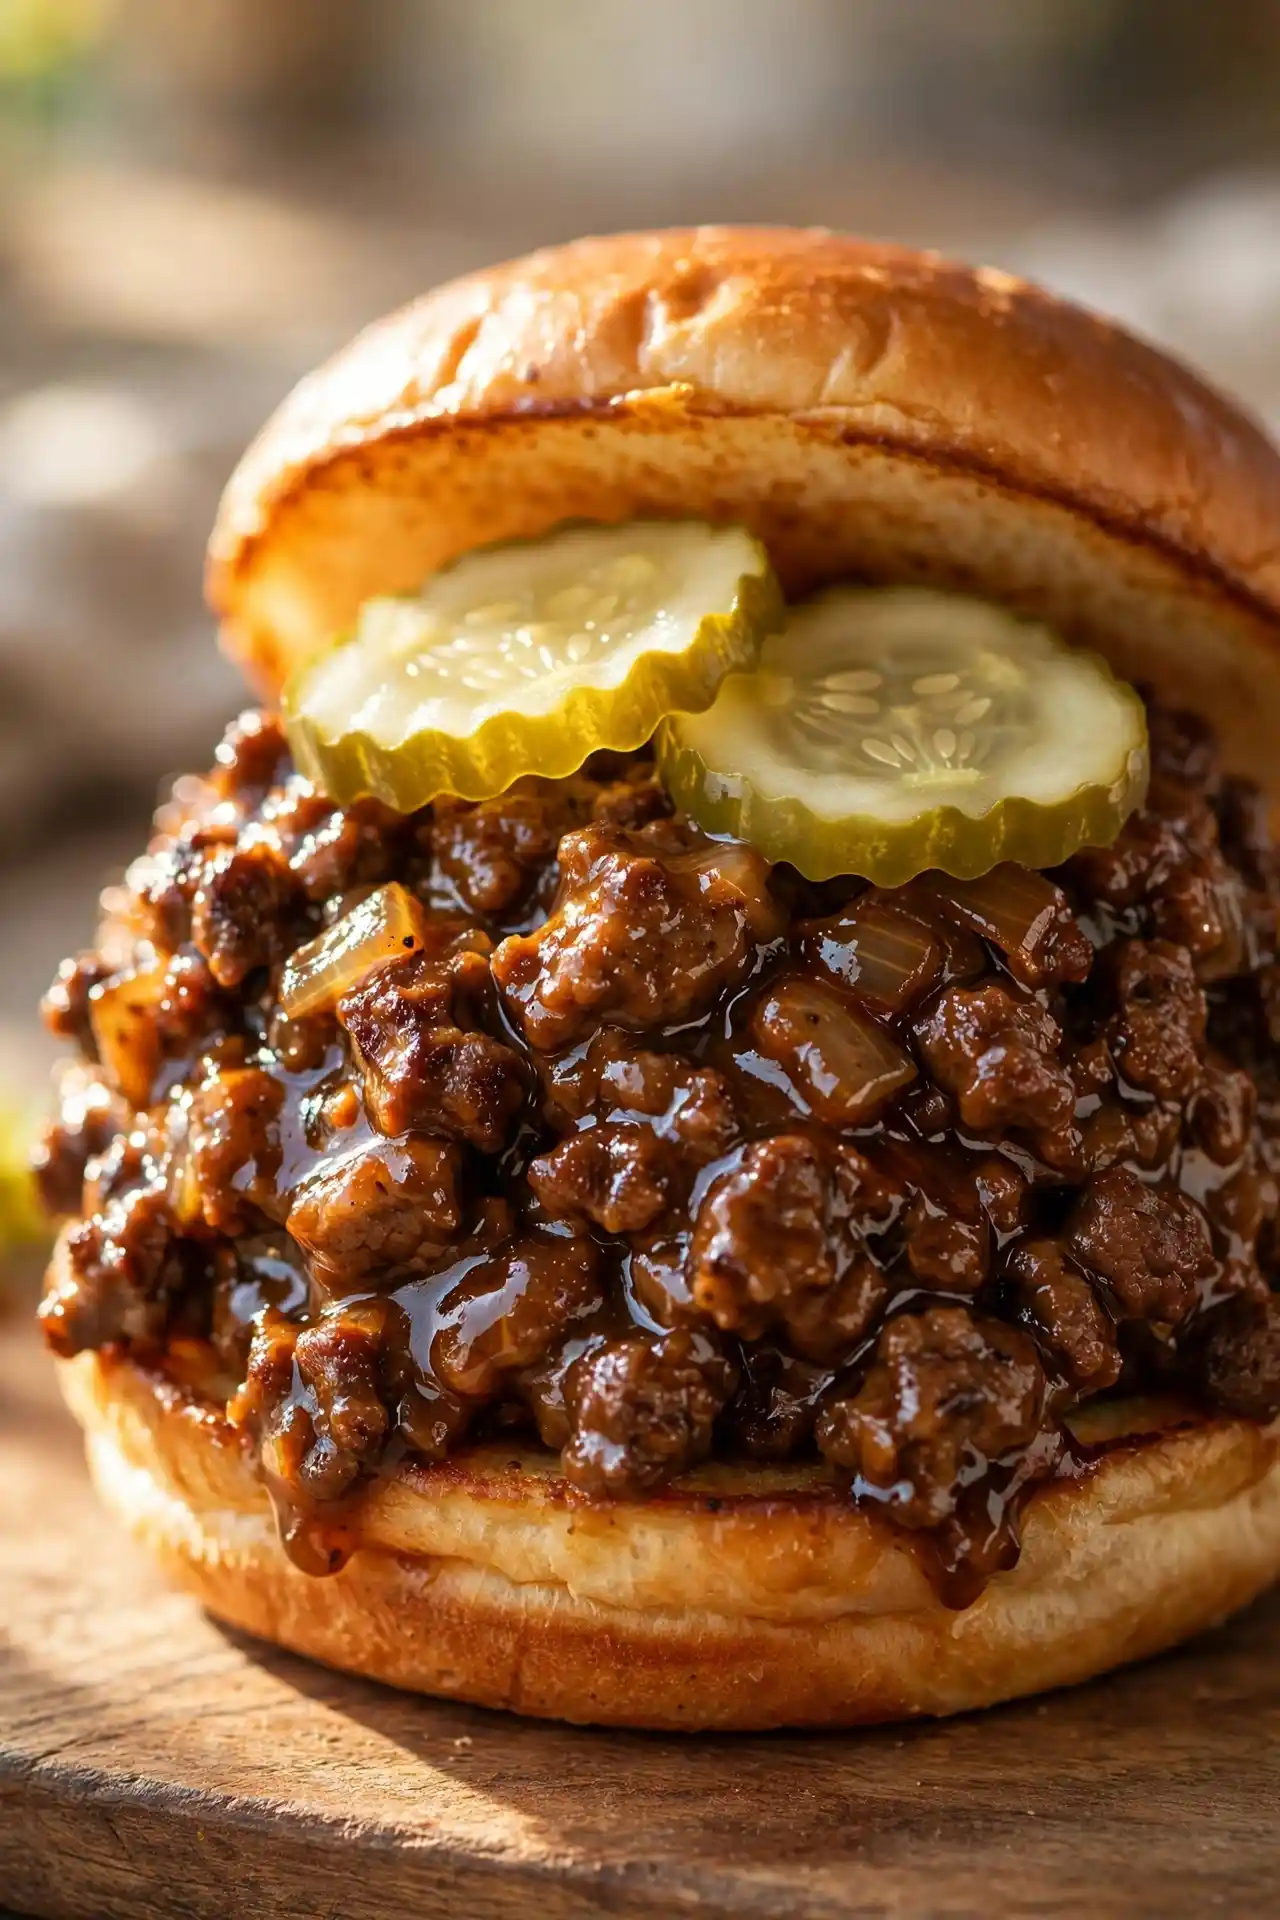
Place the hamburger buns cut-side down in a dry skillet over medium heat. Toast for 1 to 2 minutes until the cut surface is golden. Spoon the hot filling onto the bottom bun, add pickle slices if using, and press the top bun gently into place. Serve immediately.

Key Tips for Best Results
Toast the buns every time, no exceptions. A raw bun soaks through in about two minutes under hot filling. Toast cut-side down in a dry skillet until golden, and it holds up long enough for the entire meal. This single step is the difference between a sandwich and a mess.
Adjust sweetness and acidity after simmering, not before. Ketchup brands vary considerably in sweetness. Taste the filling after it has simmered for 8 minutes. If it is too sweet, add 1 teaspoon of apple cider vinegar. If it is too sharp, add a pinch of extra brown sugar. Small adjustments at this stage are far more precise than guessing at the start.
Dice the vegetables finely and consistently. Aim for roughly a 4mm dice on both the onion and bell pepper. Larger chunks do not fully soften within the cooking time and create uneven texture in the finished filling.
Common Mistakes to Avoid
Using 90/10 or leaner ground beef
Why it happens: People assume leaner beef is always better.
How to avoid it: An 80/20 blend has enough fat to keep the filling tender and moist after a 10-minute simmer. Very lean beef turns dry and slightly grainy in this type of sauce-based recipe.
Stirring the beef constantly while browning
Why it happens: Constant stirring feels like active cooking.
How to avoid it: Add the beef, break it apart, then leave it alone for 30 to 45 seconds at a time. Constant movement traps steam and prevents the browning that builds flavor in the final sauce.
Simmering with a lid on
Why it happens: It seems like it would keep the filling from drying out.
How to avoid it: Always simmer uncovered. A lid traps steam and prevents the sauce from reducing. The filling stays watery instead of thickening to the right consistency.
Adding garlic too early
Why it happens: It often gets added with the onions as a habit.
How to avoid it: Add garlic only after the onion and bell pepper have softened. Garlic added to a dry, very hot pan at the start will burn quickly and turn bitter, which affects the entire flavor of the dish.
Variations and Substitutions
Ground turkey instead of beef: Works well but produces a lighter, slightly less rich filling. Increase the smoked paprika to 1 teaspoon and add an extra tablespoon of tomato paste to compensate for the lower fat content. Brown it the same way you would beef.
Spicier version: Add 1/4 to 1/2 teaspoon of cayenne pepper with the other spices, or stir in 1 to 2 teaspoons of your preferred hot sauce when you add the ketchup. Frank’s RedHot works particularly well here without changing the base flavor.
Gluten-free version: Serve on certified gluten-free buns and verify that your ketchup and Worcestershire sauce labels say gluten-free. All other ingredients in this recipe are naturally gluten-free, but manufactured products like ketchup occasionally contain wheat-derived additives depending on the brand.
What to Serve With Sloppy Joes
Oven-baked potato wedges — Cut into thick wedges, tossed in oil and smoked paprika, roasted at 200°C (400°F) for 35 to 40 minutes. They hold their own alongside something saucy in a way that thin fries cannot.
Creamy coleslaw — Cool, crunchy, and slightly tangy. The contrast against the warm, sweet-savory filling is one of the better food combinations you can put on the same plate.
Corn on the cob — A summer standard that works here because its natural sweetness does not compete with the filling and requires almost no preparation effort.
Dill pickle chips — Serve a pile on the side or stack them directly into the sandwich. The brine cuts through the richness and sharpens the whole flavor profile.
Simple green salad — If you want something lighter on the plate, a romaine salad with a red wine vinegar dressing is enough contrast without adding more prep time.

Storage, Reheating and Make-Ahead
Fridge: Store the cooled filling in an airtight container for up to 4 days. Keep the filling separate from the buns. Buns stored with the filling absorb moisture quickly and go stale.
Freezer: Transfer fully cooled filling into a zip-lock freezer bag or airtight container. Lay flat to freeze and store for up to 3 months. Thaw overnight in the refrigerator before reheating. The FDA guidelines on safe food storage times recommend keeping cooked ground beef dishes frozen no longer than 3 to 4 months for best quality.
Reheat: Warm the filling in a skillet over medium-low heat with 2 to 3 tablespoons of water or beef stock, stirring occasionally, for 4 to 5 minutes until heated through. The added liquid restores the sauce consistency. Microwave also works: cover with a damp paper towel and heat in 60-second intervals, stirring between each.
Make-ahead: The filling can be made up to 2 days in advance and refrigerated in an airtight container. The flavor actually improves by the next day as the spices meld together. Toast fresh buns right before serving.
Allergen and Dietary Disclosure
Contains fish (Worcestershire sauce contains anchovies). To make this fish-free, substitute soy sauce at a 1:1 ratio, or use a vegan Worcestershire sauce, which is widely available at most grocery stores and online.
Contains gluten (hamburger buns; standard ketchup may also contain wheat-derived vinegar depending on the brand). To make this gluten-free, use certified gluten-free buns and verify that your ketchup and Worcestershire sauce are labeled gluten-free.
Always read individual product labels carefully, as ingredients and manufacturing practices vary by brand and can change without notice.
Nutrition Information
Per serving (1 filled bun, 1/4 of total recipe):
| Nutrient | Per Serving |
|---|---|
| Calories | 485 kcal |
| Protein | 26g |
| Total Carbohydrates | 44g |
| Dietary Fiber | 2g |
| Total Sugars | 14g |
| Total Fat | 22g |
| Saturated Fat | 8g |
| Sodium | 680mg |
| Cholesterol | 75mg |
| Potassium | 480mg |
| Iron | 3.5mg |
“Nutritional values are estimates only and may vary based on specific ingredients, brands, and portion sizes used. For precise dietary needs, consult a registered dietitian.”
Frequently Asked Questions
Can I make sloppy joe filling the day before?
Yes, and it is actually a good approach. The filling keeps in the fridge for up to 4 days, and the flavor genuinely improves after resting overnight as the spices continue to develop. Reheat in a skillet with a splash of water or beef stock to loosen the sauce back to the right consistency.
How do I keep the bun from getting soggy?
Toast the buns cut-side down in a dry skillet until they are golden, which forms a slight crust that slows soaking. Serving immediately also helps considerably. If you are setting up for a group, keep the filling in a warm pot and let people build their own sandwiches right before eating rather than assembling in advance.
Can I use ground turkey in this sloppy joe recipe?
Yes. Use 93% lean ground turkey and add an extra tablespoon of tomato paste to account for the lower fat content. The filling will be lighter in color and slightly less rich, but the flavor is still good. Brown it using the same method as the beef, leaving it undisturbed between stirs so it gets some color.
Why does my sloppy joe taste too sweet?
Most likely your ketchup is sweeter than the recipe assumes, which varies significantly by brand. After simmering, stir in 1 teaspoon of apple cider vinegar and an extra teaspoon of Worcestershire sauce. Both add acidity and savory depth that offset excess sweetness. Taste again before adding anything else.
How long does sloppy joe filling last in the freezer?
Up to 3 months in an airtight container or freezer bag. Let the filling cool completely before transferring to the freezer, and thaw it overnight in the refrigerator rather than on the counter.
Is this recipe suitable for young children?
The filling as written is mild. Smoked paprika adds color and a very faint warmth, not noticeable heat. If cooking for young children who are sensitive to any spice, you can omit the smoked paprika entirely without a significant change in flavor.
Conclusion
This sloppy joe recipe is worth making from scratch because it genuinely tastes better than the canned version and takes no more time. The single most important thing to get right is the simmer: keep the lid off, give it 8 to 10 minutes over medium-low heat, and let the sauce reduce until it holds a trail when you drag a spoon through it. Get that right and the sandwich takes care of itself. Any leftovers you have the next day reheat well in a skillet with a small splash of stock. The flavor is actually a bit better after a night in the fridge.
Sloppy Joe Recipe Card
Sloppy Joe Recipe (From Scratch, No Canned Sauce)
Ingredients
Method
- Heat oil in a large skillet over medium-high heat. Add ground beef and break into crumbles. Cook 6 to 8 minutes, leaving it undisturbed for 30 to 45 seconds at a time, until no pink remains and the edges are browned. Drain excess fat, leaving about 1 tablespoon in the pan.
- Add onion and bell pepper. Cook over medium heat for 4 to 5 minutes until onion is translucent and pepper has softened. Add garlic and cook 1 minute, stirring constantly, until fragrant.
- Push the mixture to one side. Add tomato paste to the cleared space and cook 1 to 2 minutes, stirring, until it darkens to a deep brick-red. Stir the cooked paste through the entire mixture.
- Add ketchup, Worcestershire sauce, brown sugar, yellow mustard, smoked paprika, salt, pepper, and water. Stir until fully combined.
- Reduce heat to medium-low. Simmer uncovered for 8 to 10 minutes, stirring every 2 minutes, until the sauce is thick enough to hold a brief channel when a spoon is dragged across the pan bottom.
- Toast buns cut-side down in a dry skillet for 1 to 2 minutes until golden. Spoon filling onto buns, add pickles if using, and serve immediately.